Prophet X/XL: Motherboard & Power Supply Swap
Replacing the motherboard and power supply in the Prophet X/XL is easy and only requires a screwdriver.
Tools needed: Phillips head screwdriver
IMPORTANT: Disconnect the Prophet’s IEC power cable from the socket and wait 5 minutes before continuing.
Getting inside the Prophet X/XL:
1. First, unplug all power/MIDI/USB/audio/pedal cables.
2. Remove the 2 screws in each of the wooden sides.
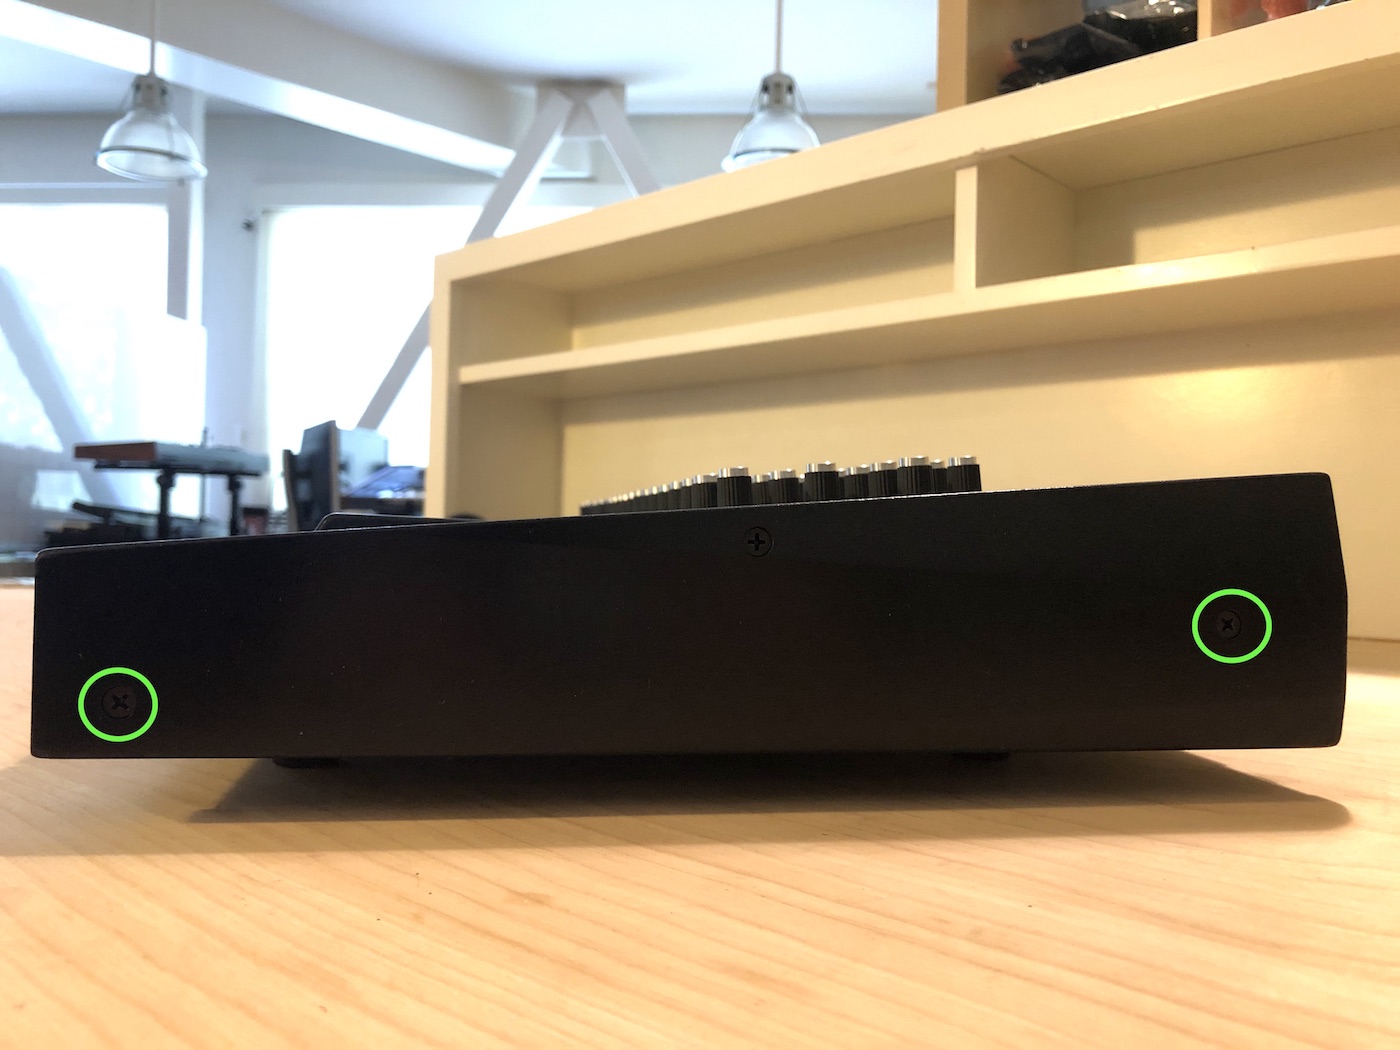
PX/XL Right Wood Screws

PX/XL Left Wood Screws
3. Place a piece of soft material down such as a blanket or pillow and flip the instrument over face down on top of the material.
4. Remove the 2 screws which hold the wheel box to the metal underside. The first screw is located immediately to the right and slightly down from the left front rubber foot.
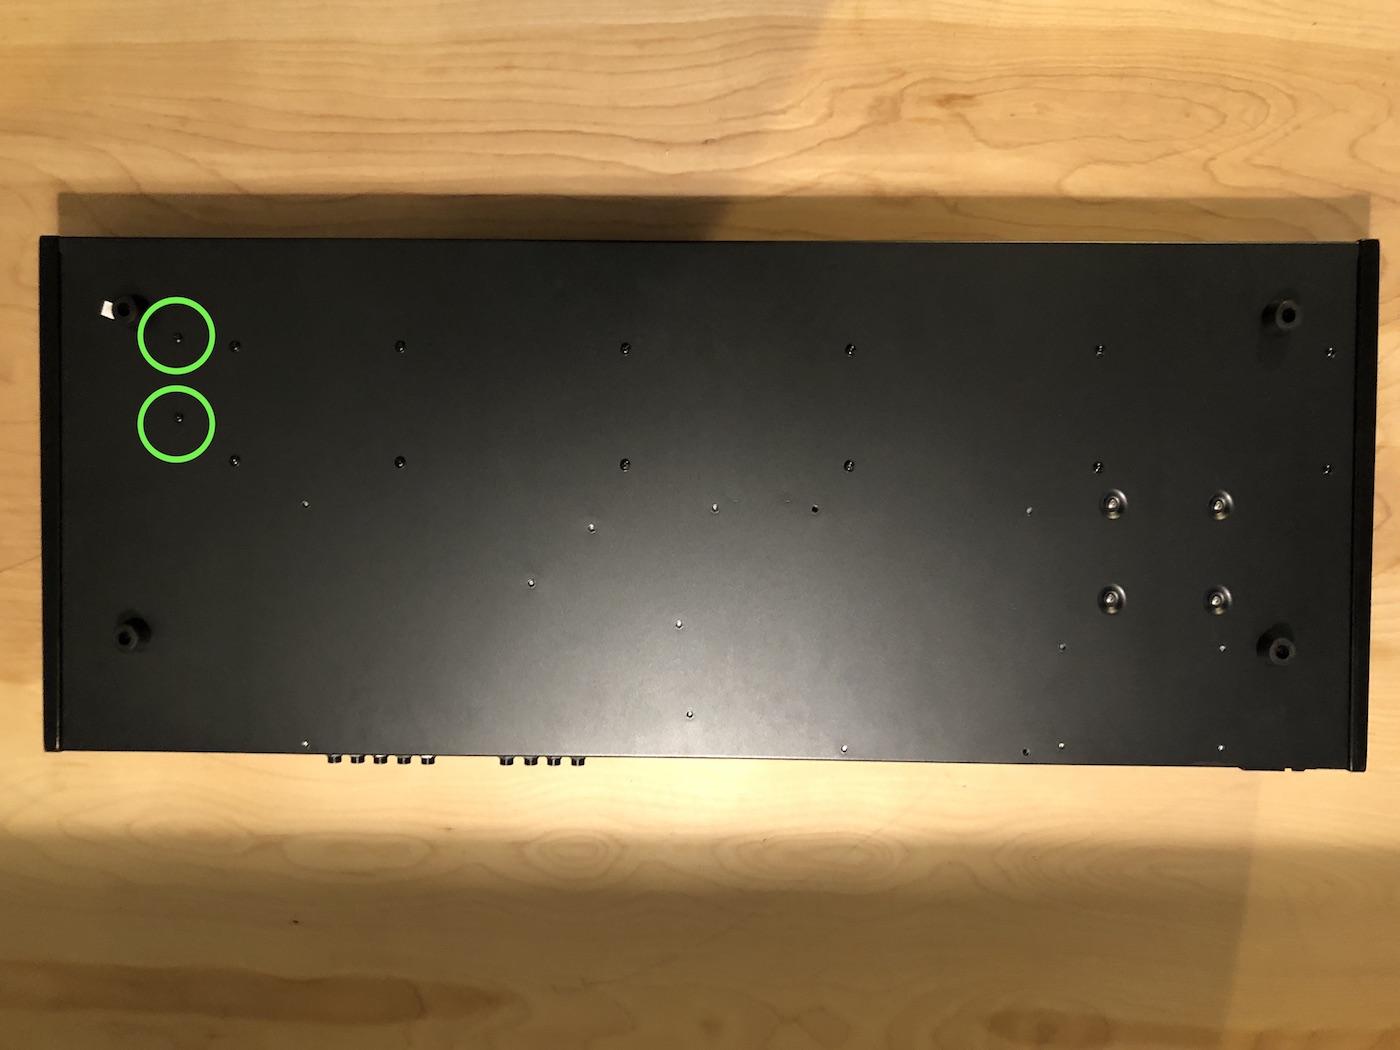
PX/XL Bottom Screws
5. Flip the unit back over into its normal position.
6. Remove the remaining two screws from the right side metal and three screws on the left side metal.
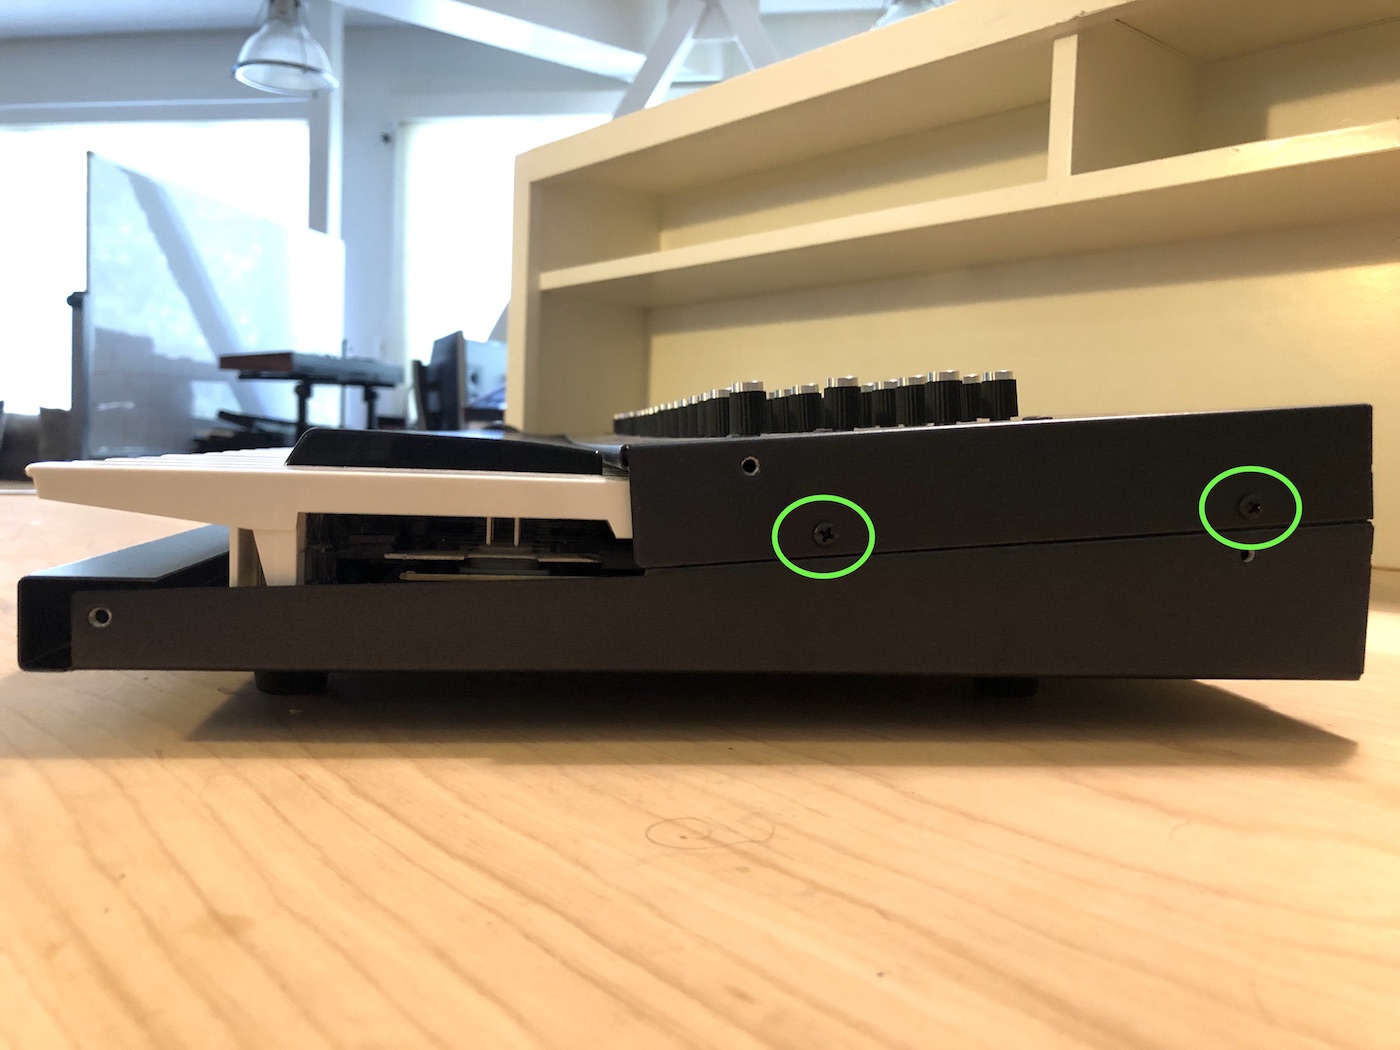
PX/XL Right Side Metal Screws
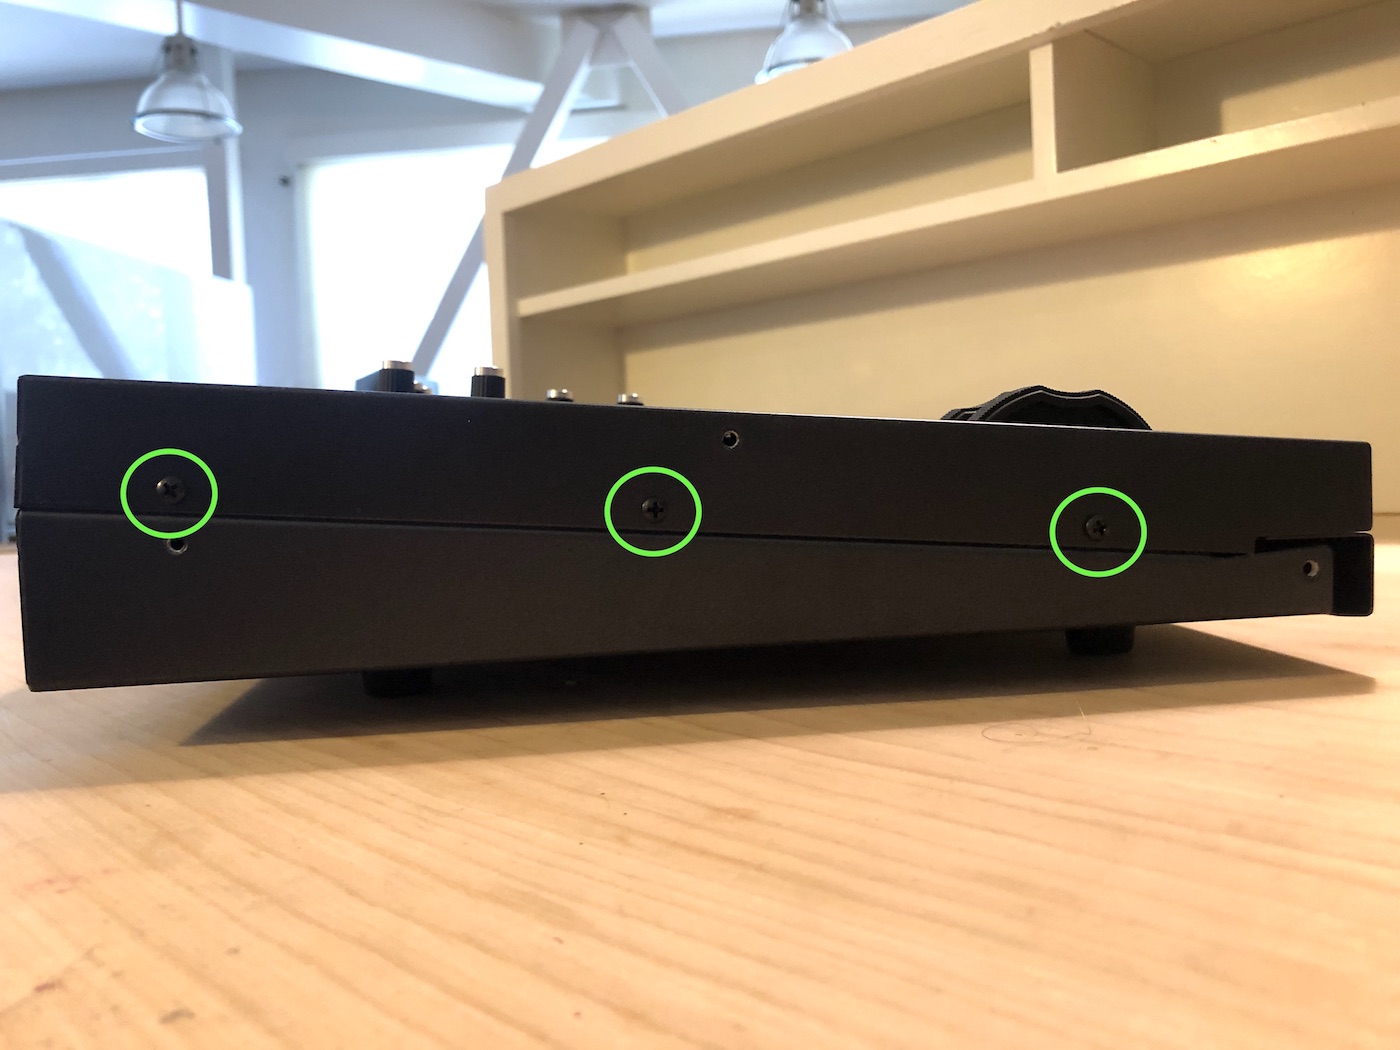
PX/XL Left Side Metal Screws
7. Lift the top panel up. It is on a hinge and is held in place with a rubber lanyard.
Removing the motherboard:
1. The motherboard is located towards the right side of the enclosure.
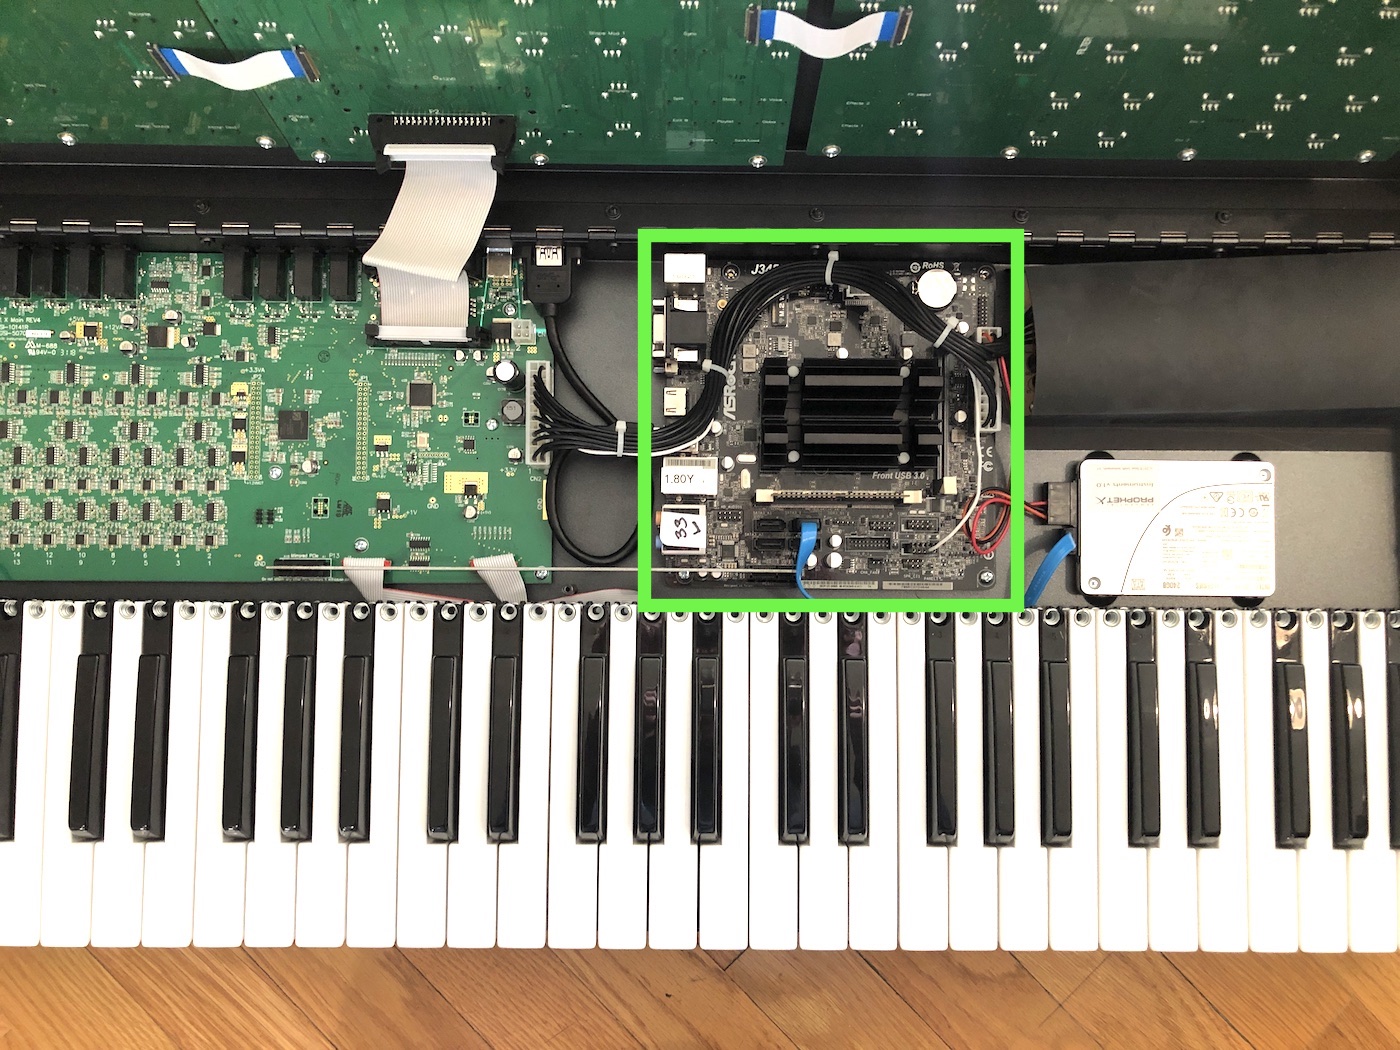
PX/XL Overview
2. The Motherboard has 5 connectors and a single stick of RAM in the lower horizontal slot. The connections are the following: PCIe, USB 3, SATA, RESET, and ATX. The next steps will outline how to remove each connection.
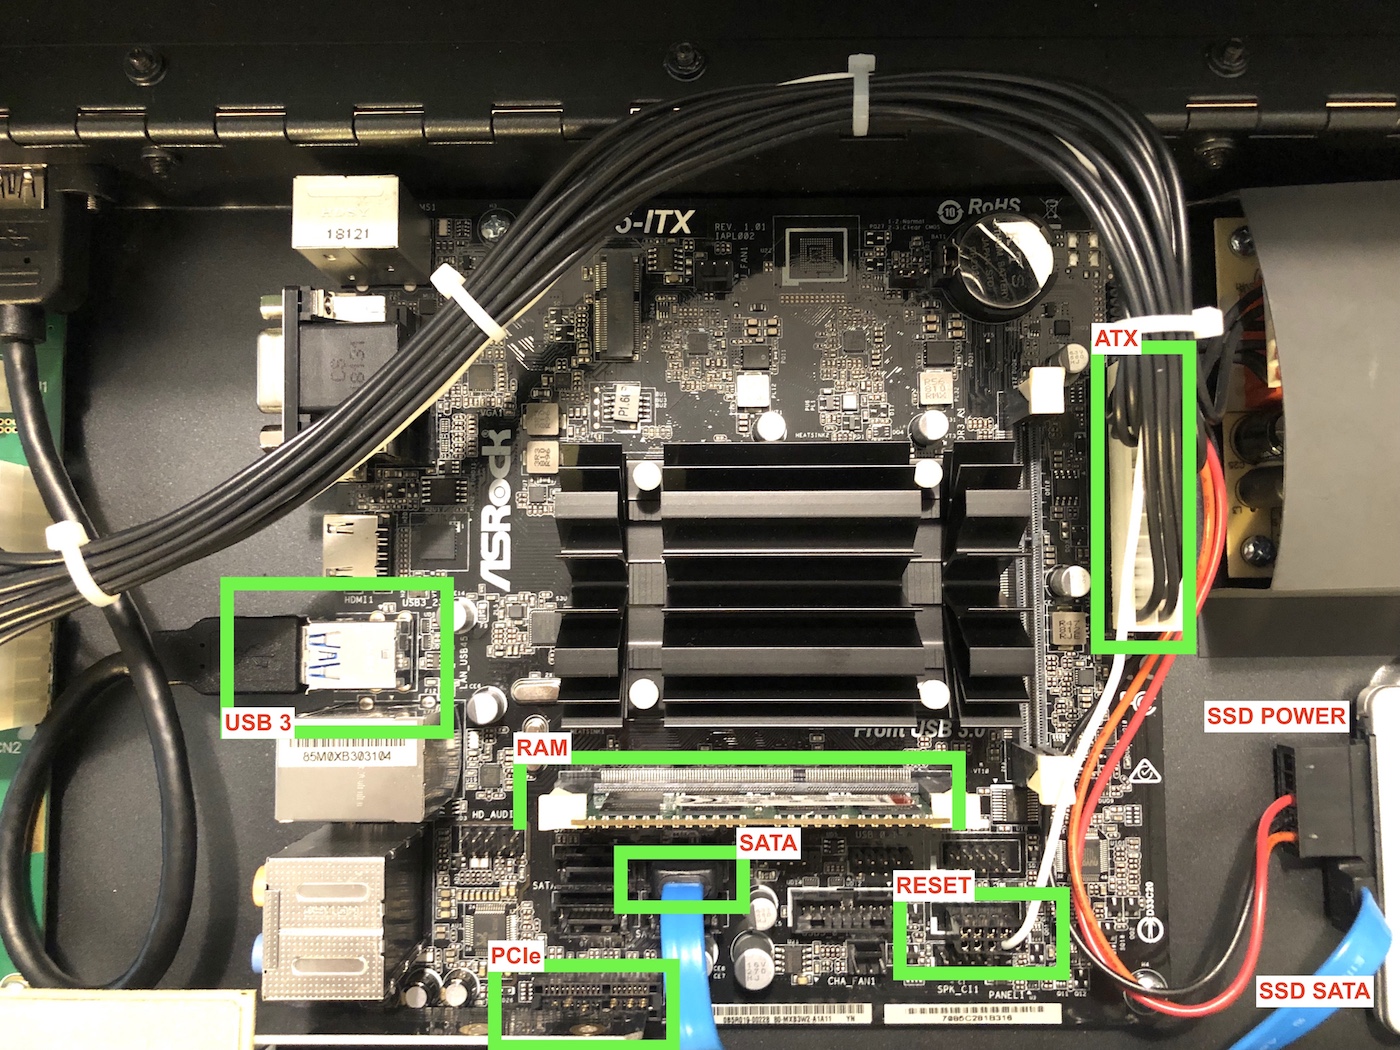
PX/XL Motherboard Connections
3. If you need to swap the RAM to the new motherboard, press the two white tabs out to unlock them, then remove the RAM stick. On the new motherboard, ensure that the tabs are open, line up the RAM stick with the slot and press it into place. The white tabs should click in as the RAM stick is seated.
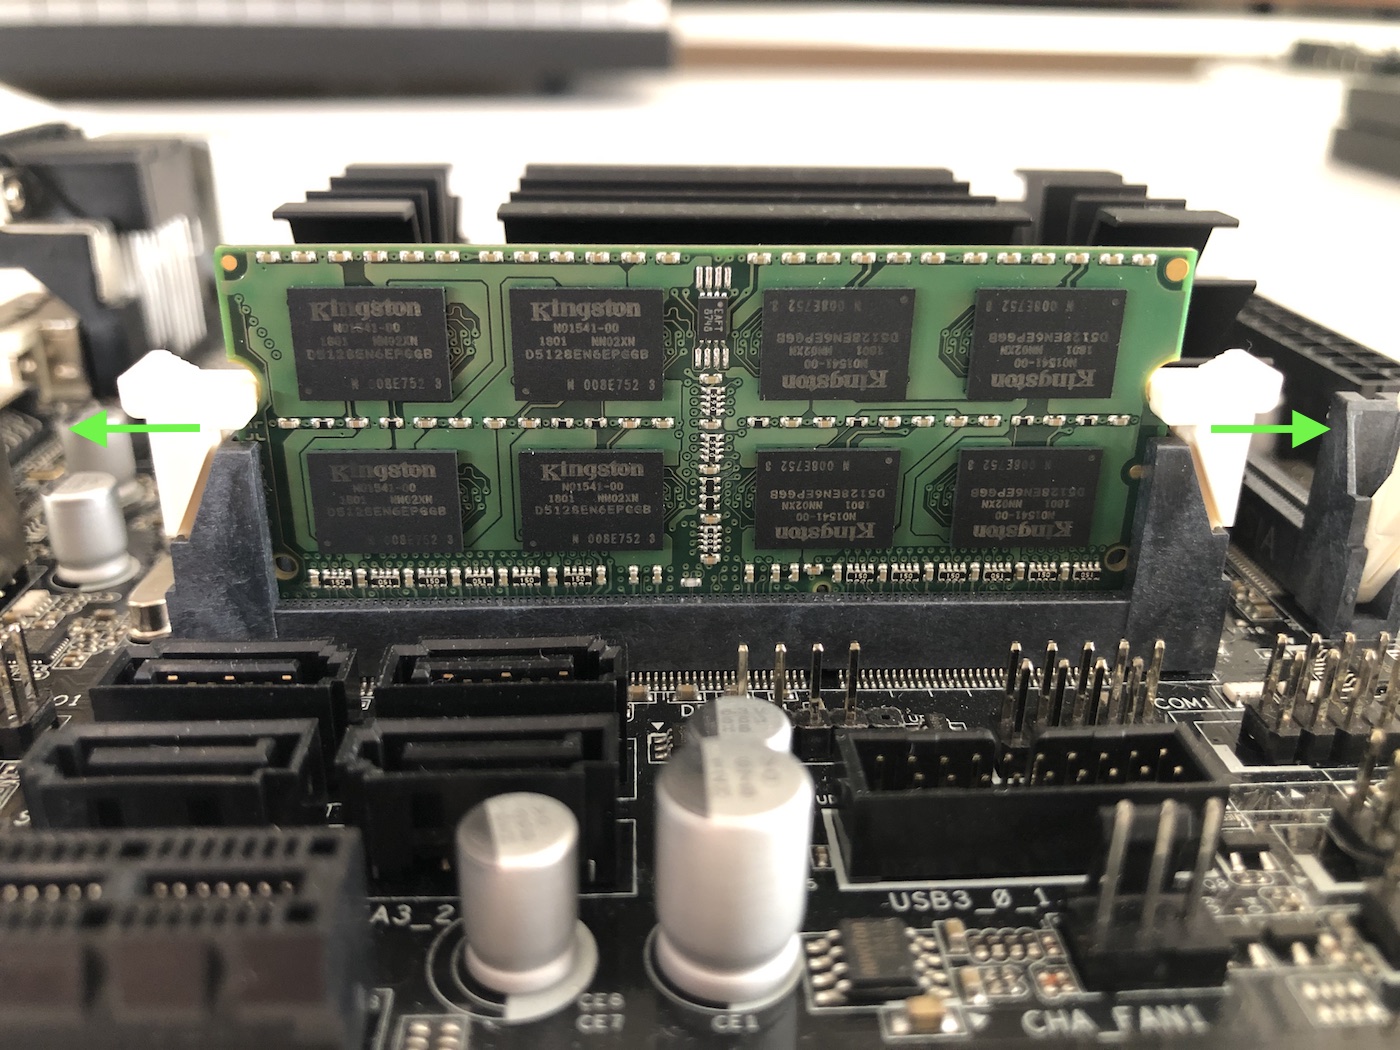
PX/XL Remove Ram
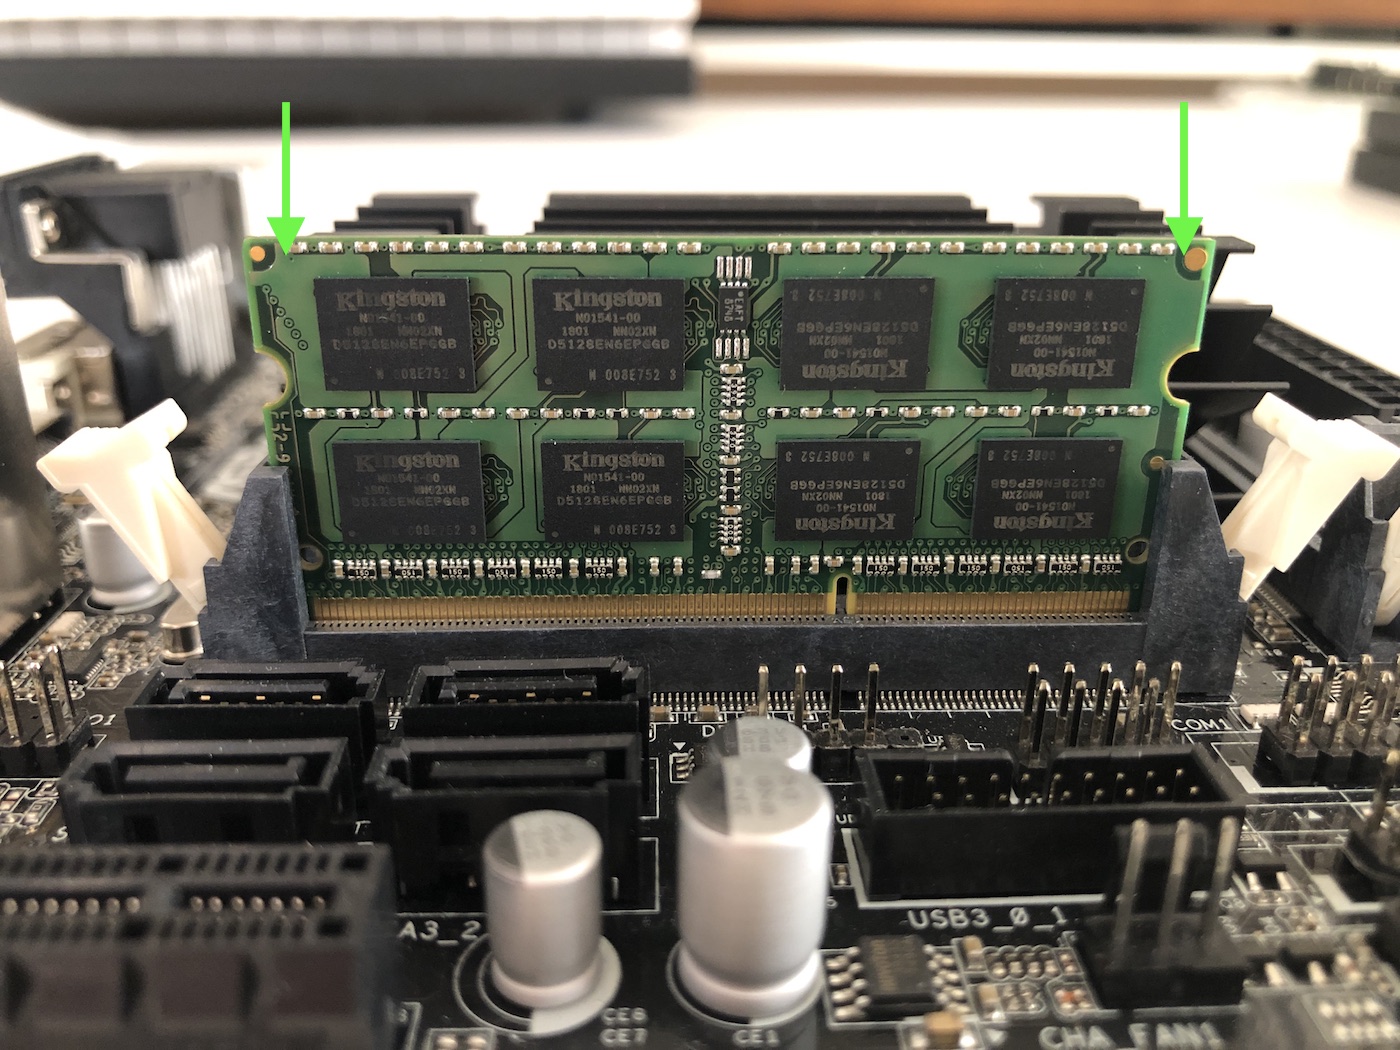
PX/XL Insert Ram
4. Locate the PCIe bridge. There is a metal bracket with two screws that holds it in place. Remove these two screws and set aside the bracket. Remove the PCIe bridge by pulling up at both ends simultaneously. Note the bracket orientation – one side is labeled with the text, ‘this side faces keybed’.
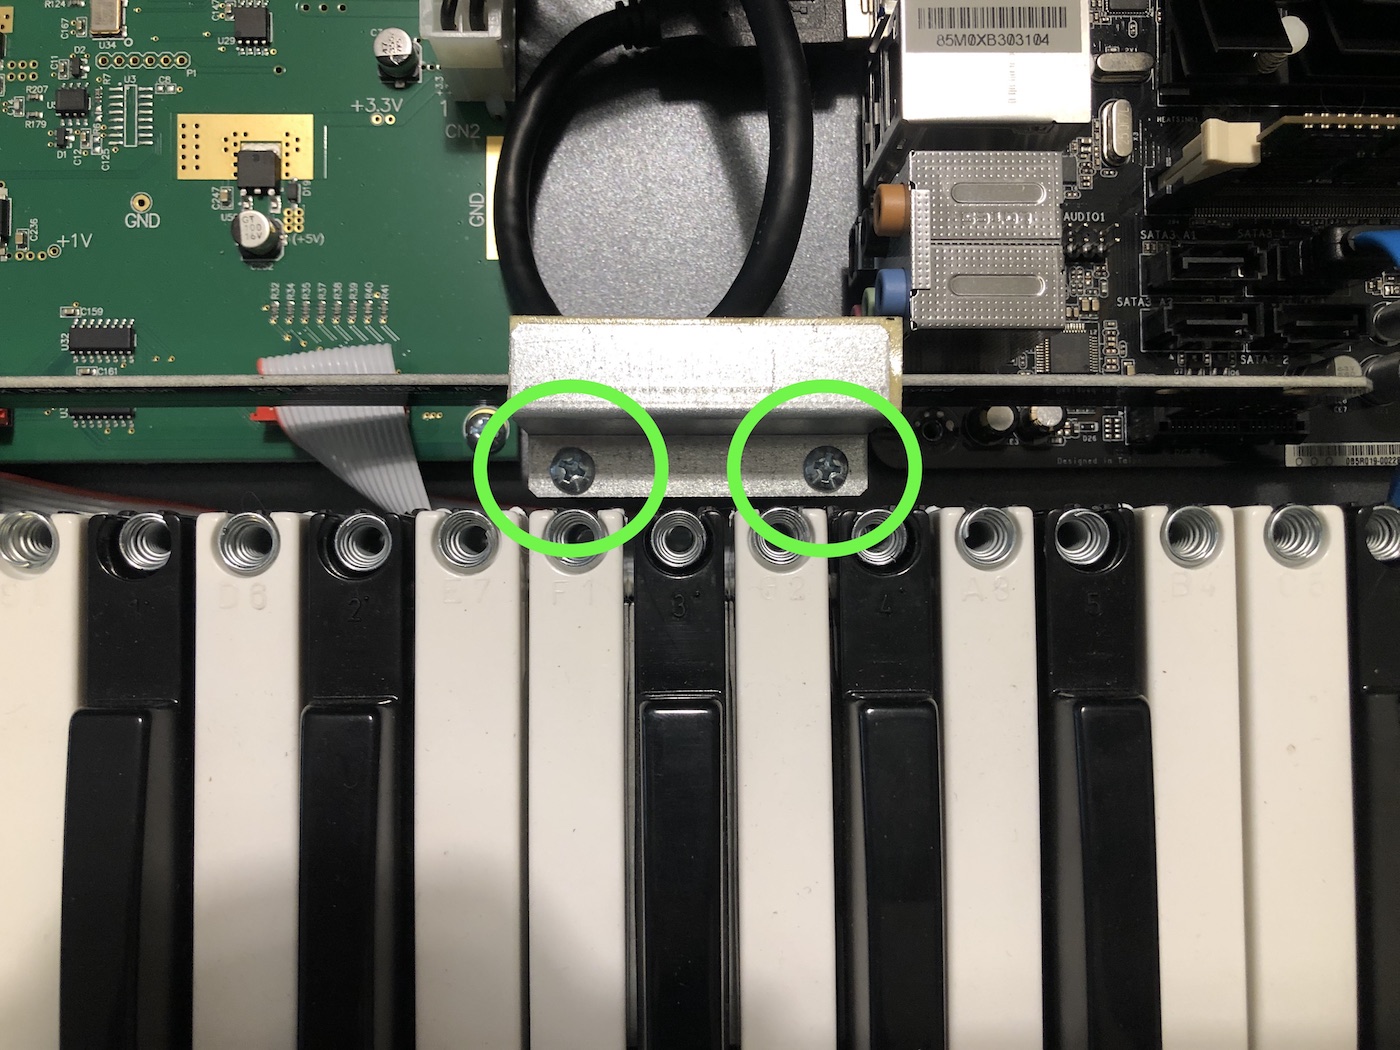
PX/XL Bracket Screws
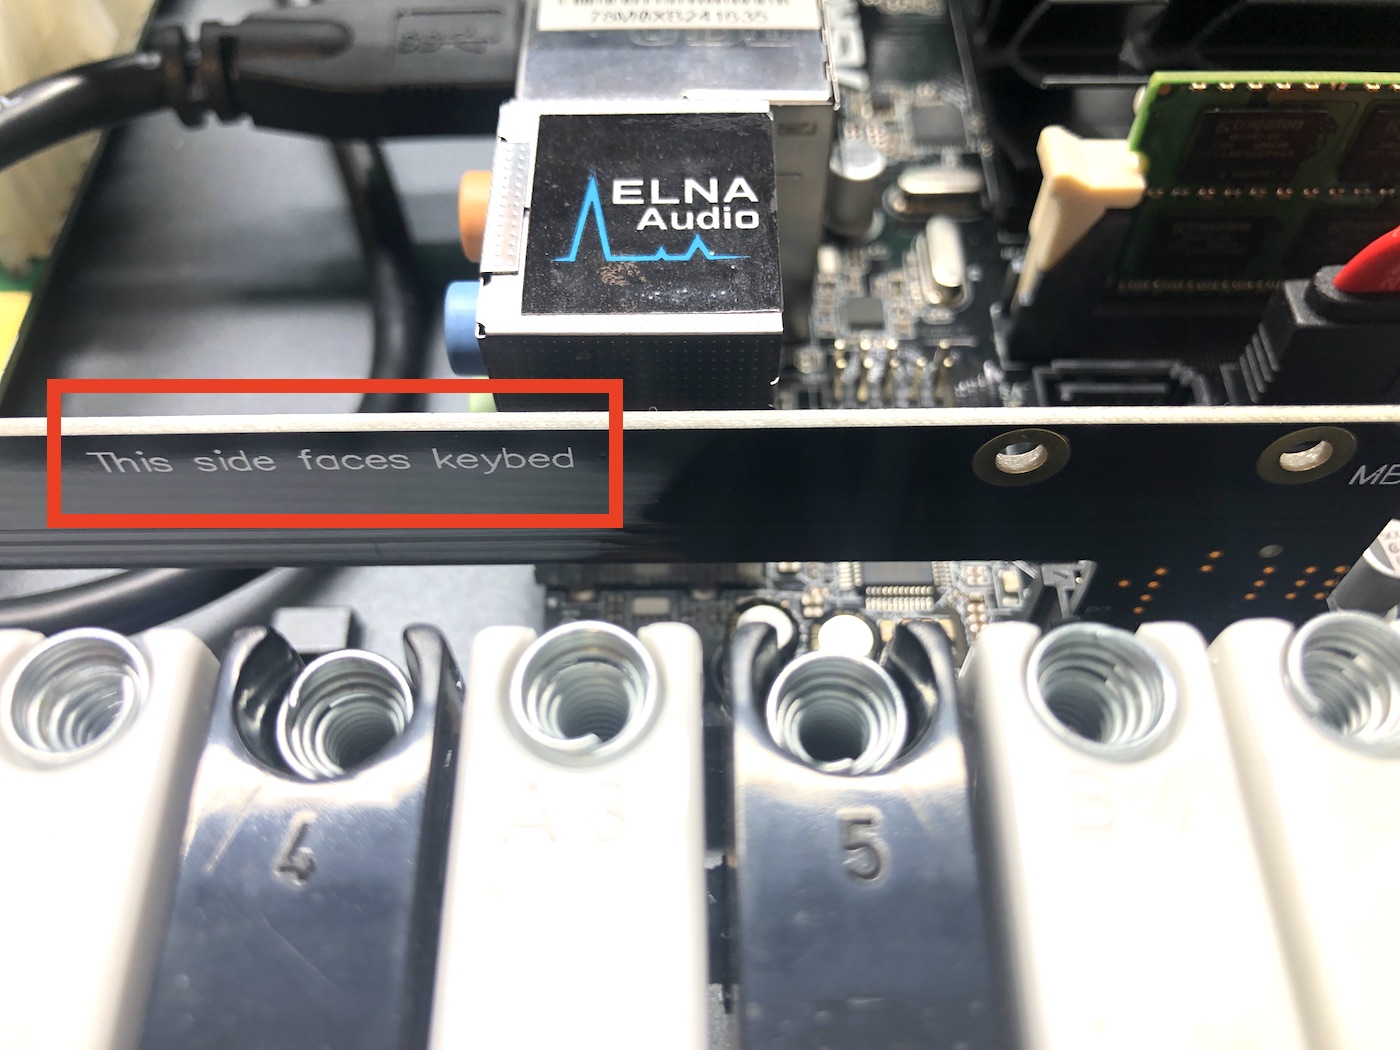
PX/XL PCIe Bridge
5. Remove the USB 3 connector. When reinstalling, be sure to plug this connector back into the lower blue USB 3 slot.
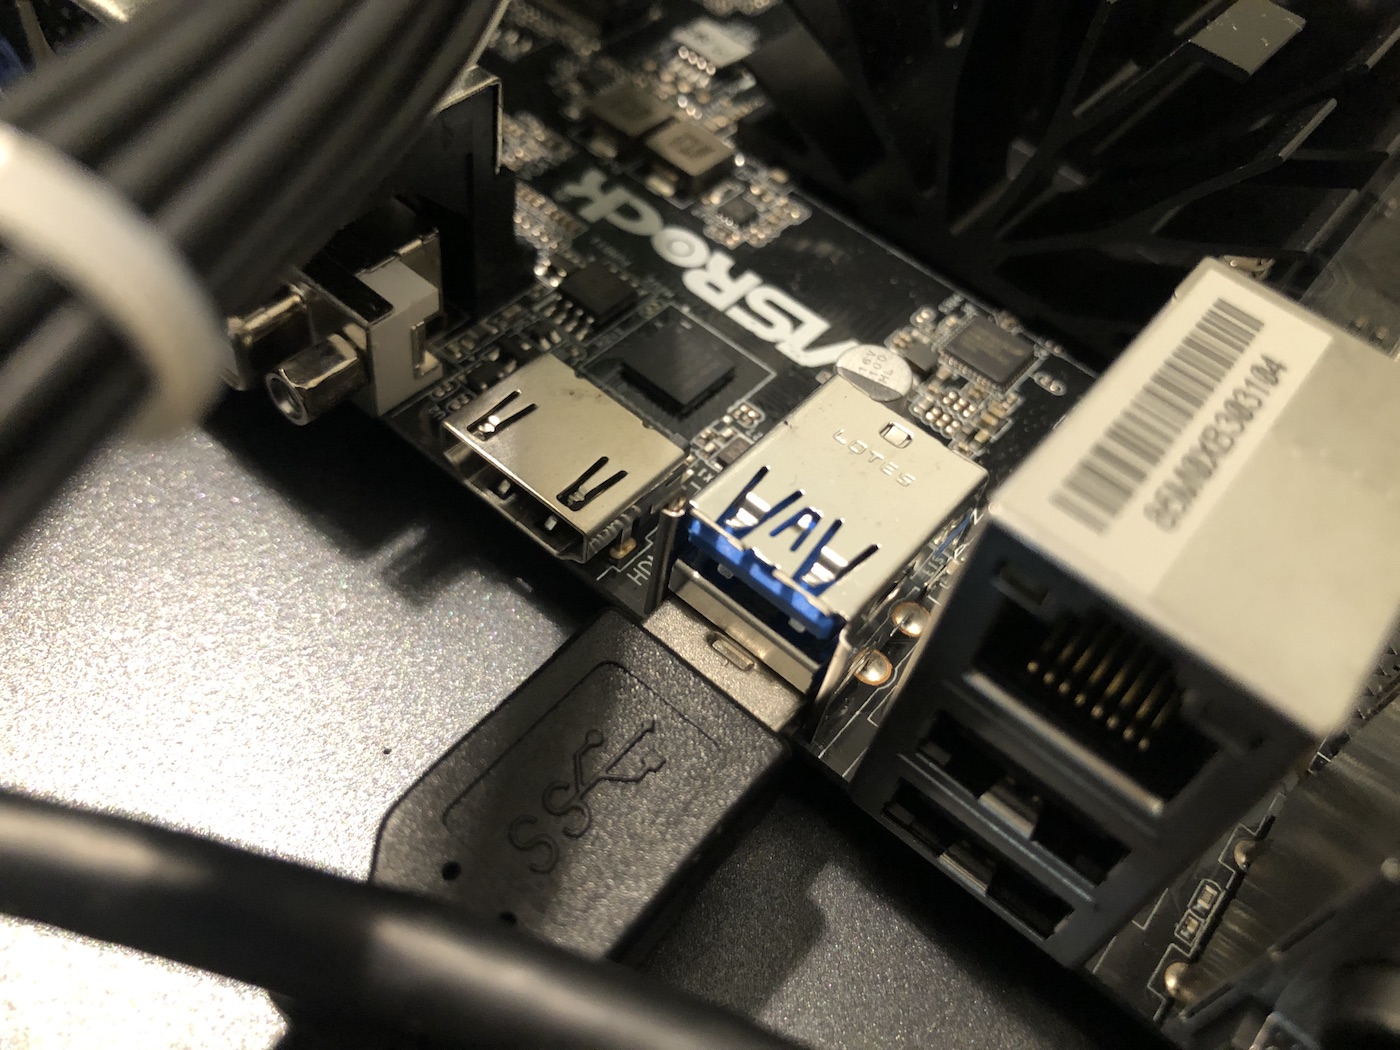
PX/XL USB 3
6. Remove the blue SATA connector. It is connected to the upper right SATA slot.
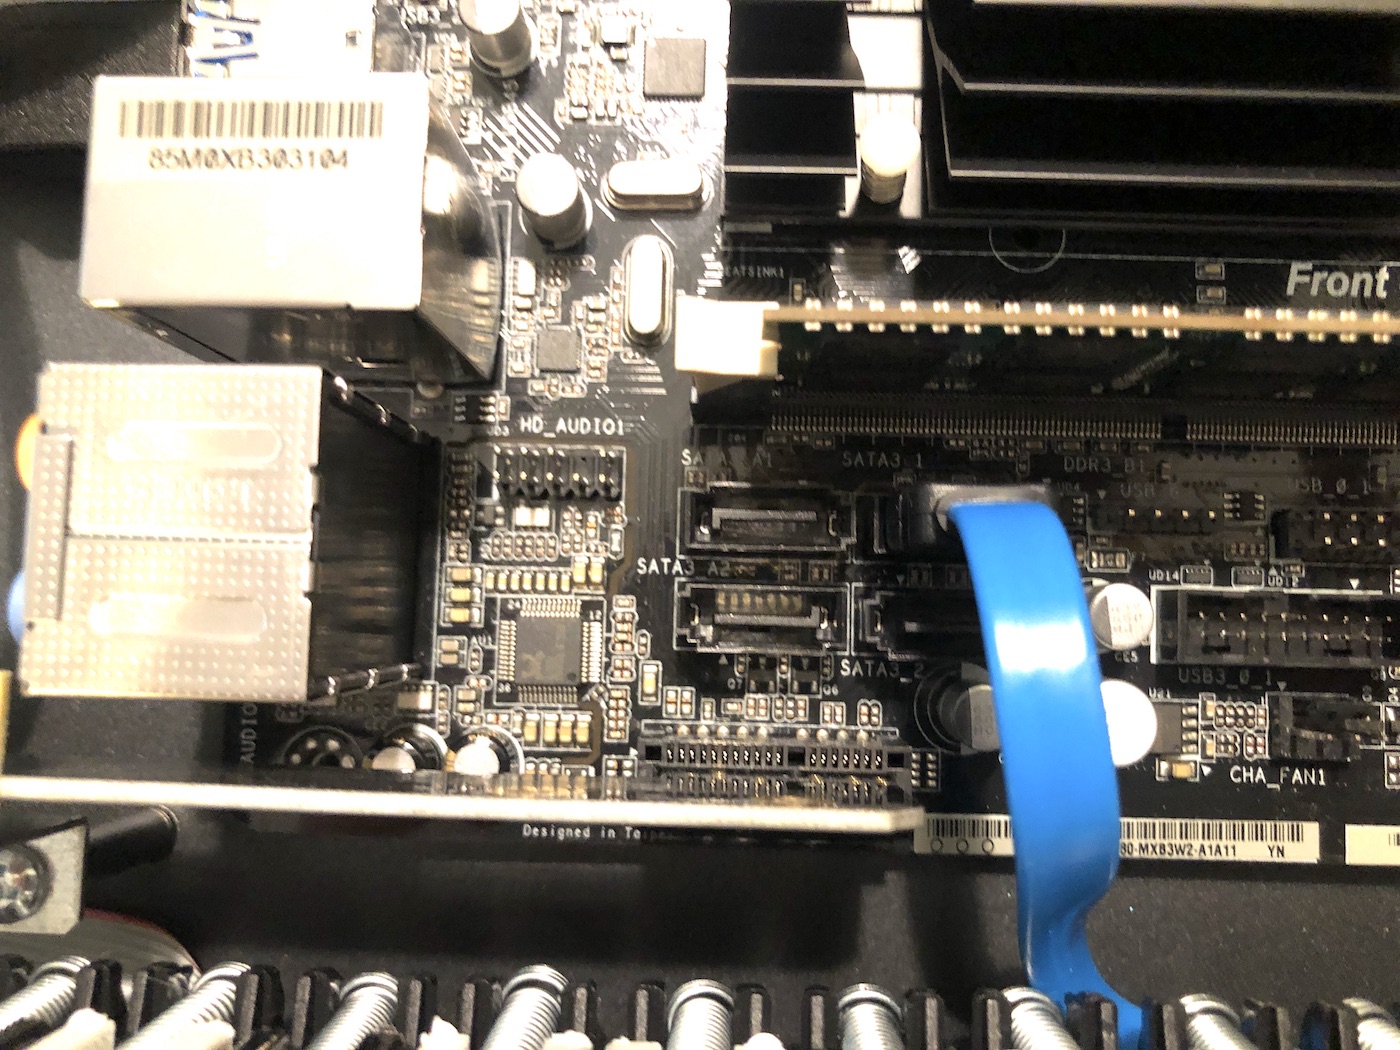
PX/XL Sata
7. Remove the RESET jumper by pulling up on the black piece connected to the white cable. Note the orientation and location. The white cable sits directly above the ‘+RESET’ text on the motherboard. DO NOT pull on the white cable itself.
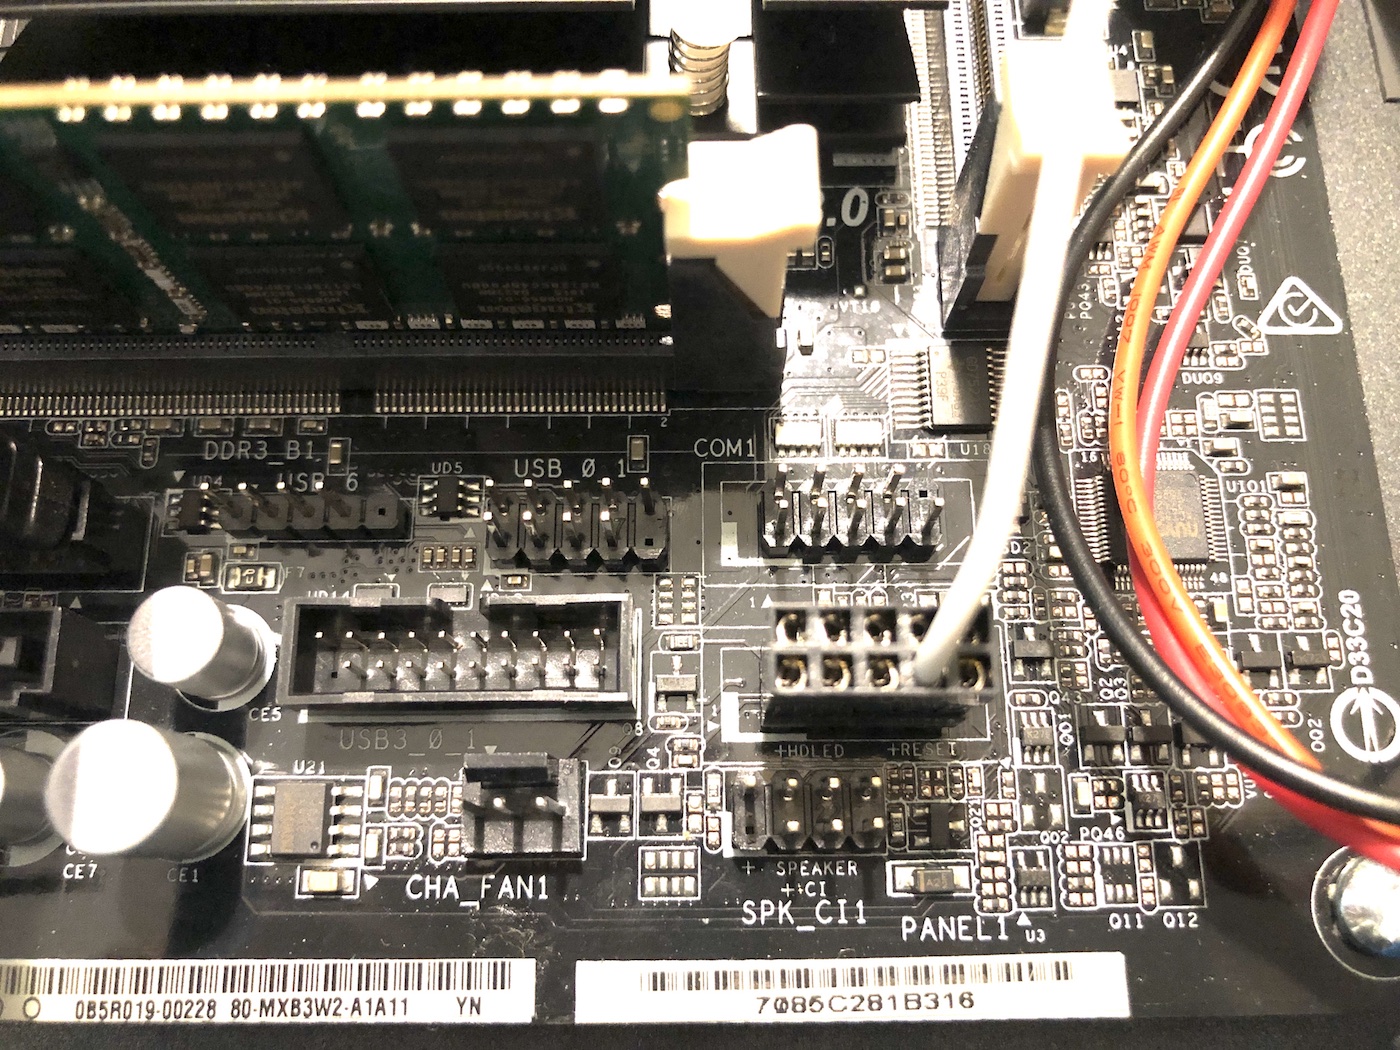
PX/XL Reset Cable
8. Remove the large ATX connector. Squeeze the plastic tab on the right side of the connector and pull up on the clear plastic connector to remove it.
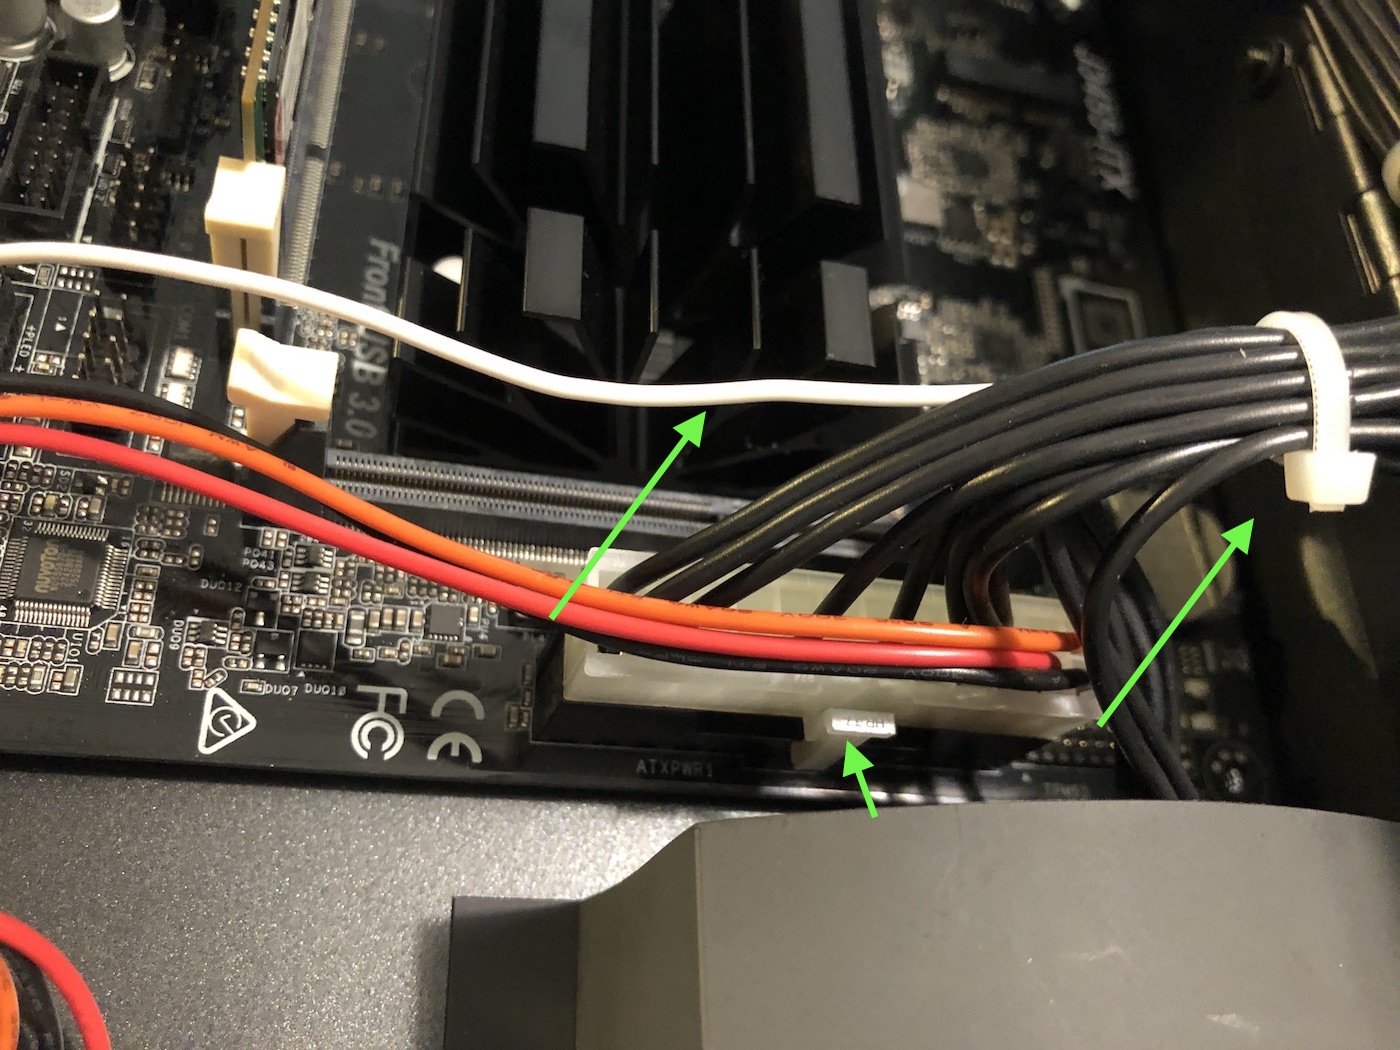
PX/XL ATX Connector
9. Remove the 4 silver screws securing the motherboard into place.

PX/XL Motherboard Screws
10. Remove the motherboard and install the replacement. Double check that the following are connected in the right orientation and location: PCIe, USB 3, SATA, RESET, ATX, RAM stick.
Removing the internal power supply:
1. IMPORTANT: **MAKE SURE** the Prophet X/XL’s IEC mains power cable is disconnected from the socket. After the cable is disconnected, wait 5 minutes before continuing.
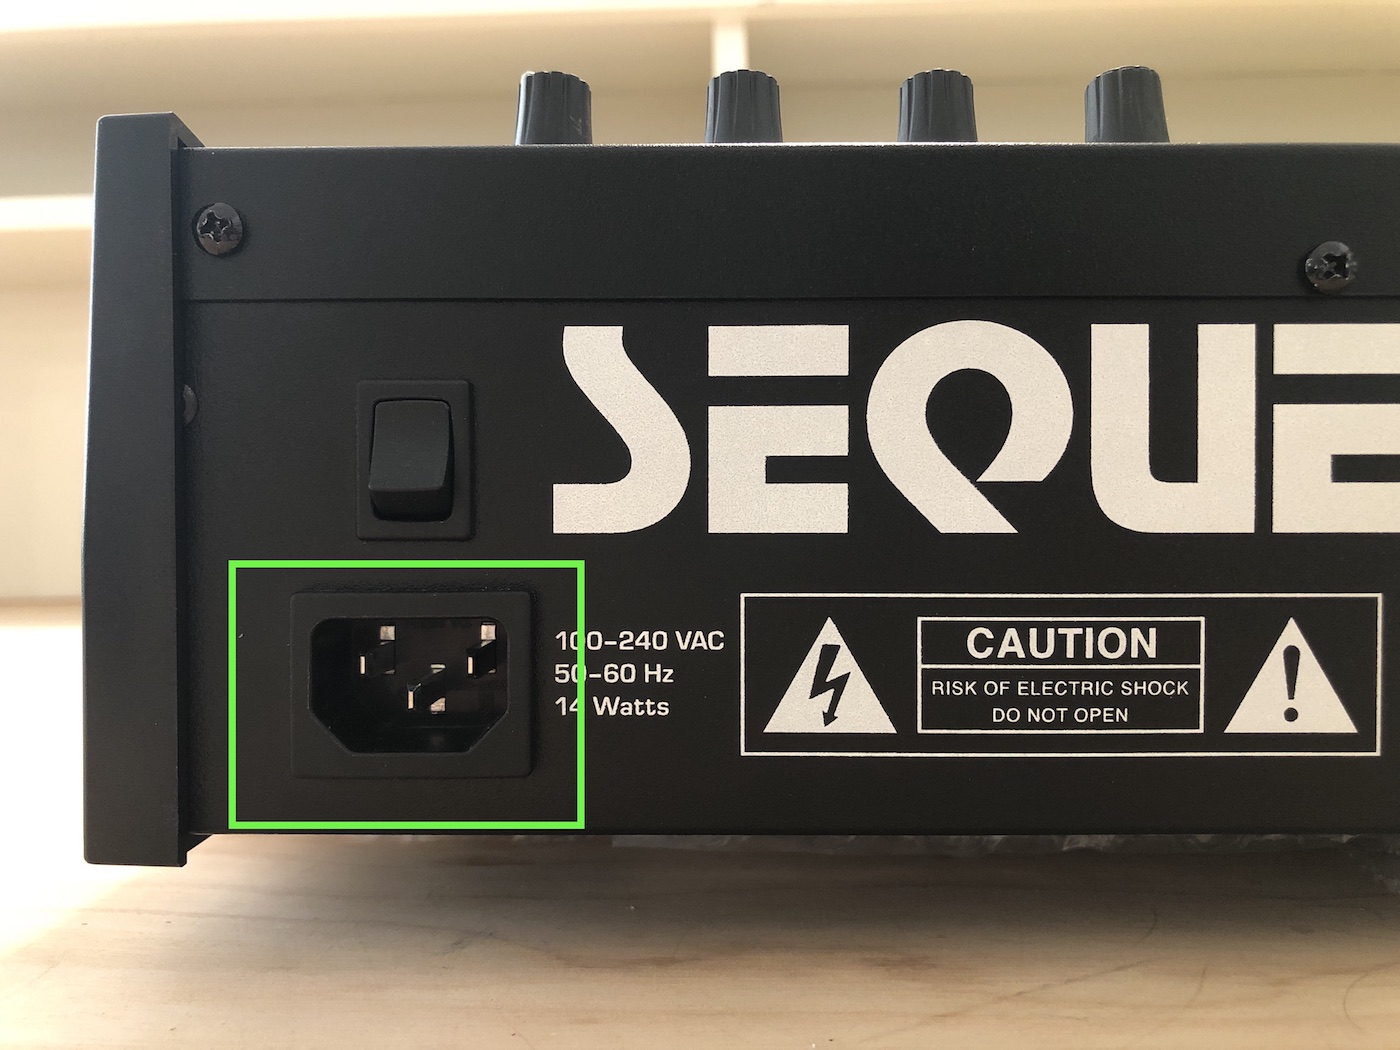
Prophet X/XL IEC Socket
2. The power supply is in the upper right corner and is underneath a folded, flexible cover. Lift the cover up to expose the power supply.
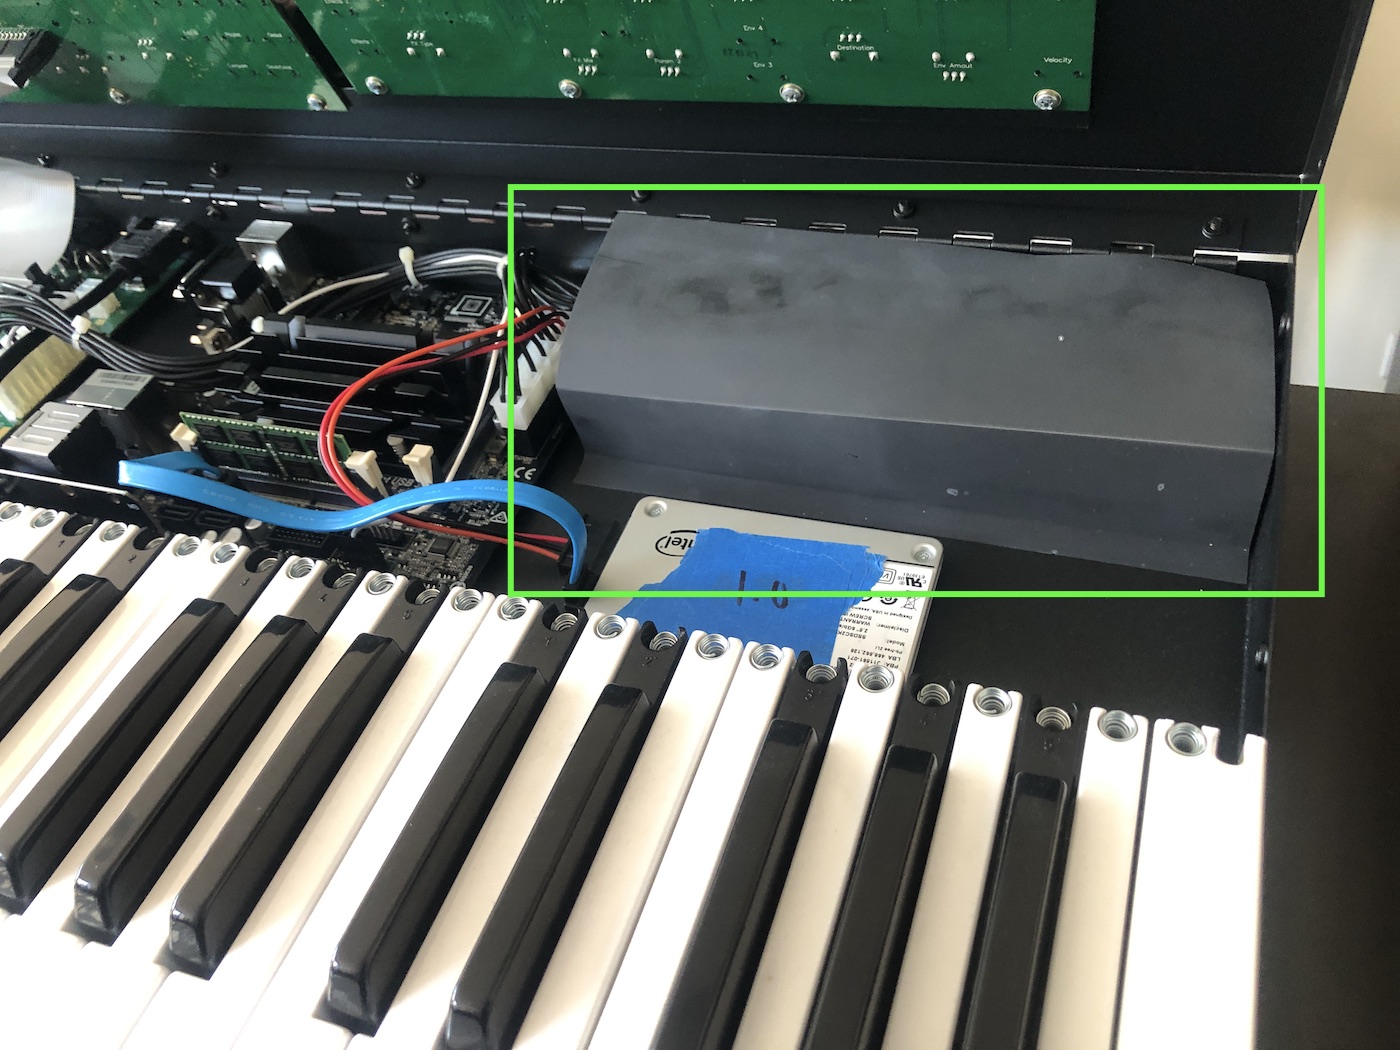
Prophet X/XL PSU Cover
3. The power supply’s 15-volt connector is visible on the left side of the power supply. It is an orange vertical rectangle. Gripping the connector itself, pull straight up with a slight side to side wiggle to remove it. DO NOT pull on the wires.
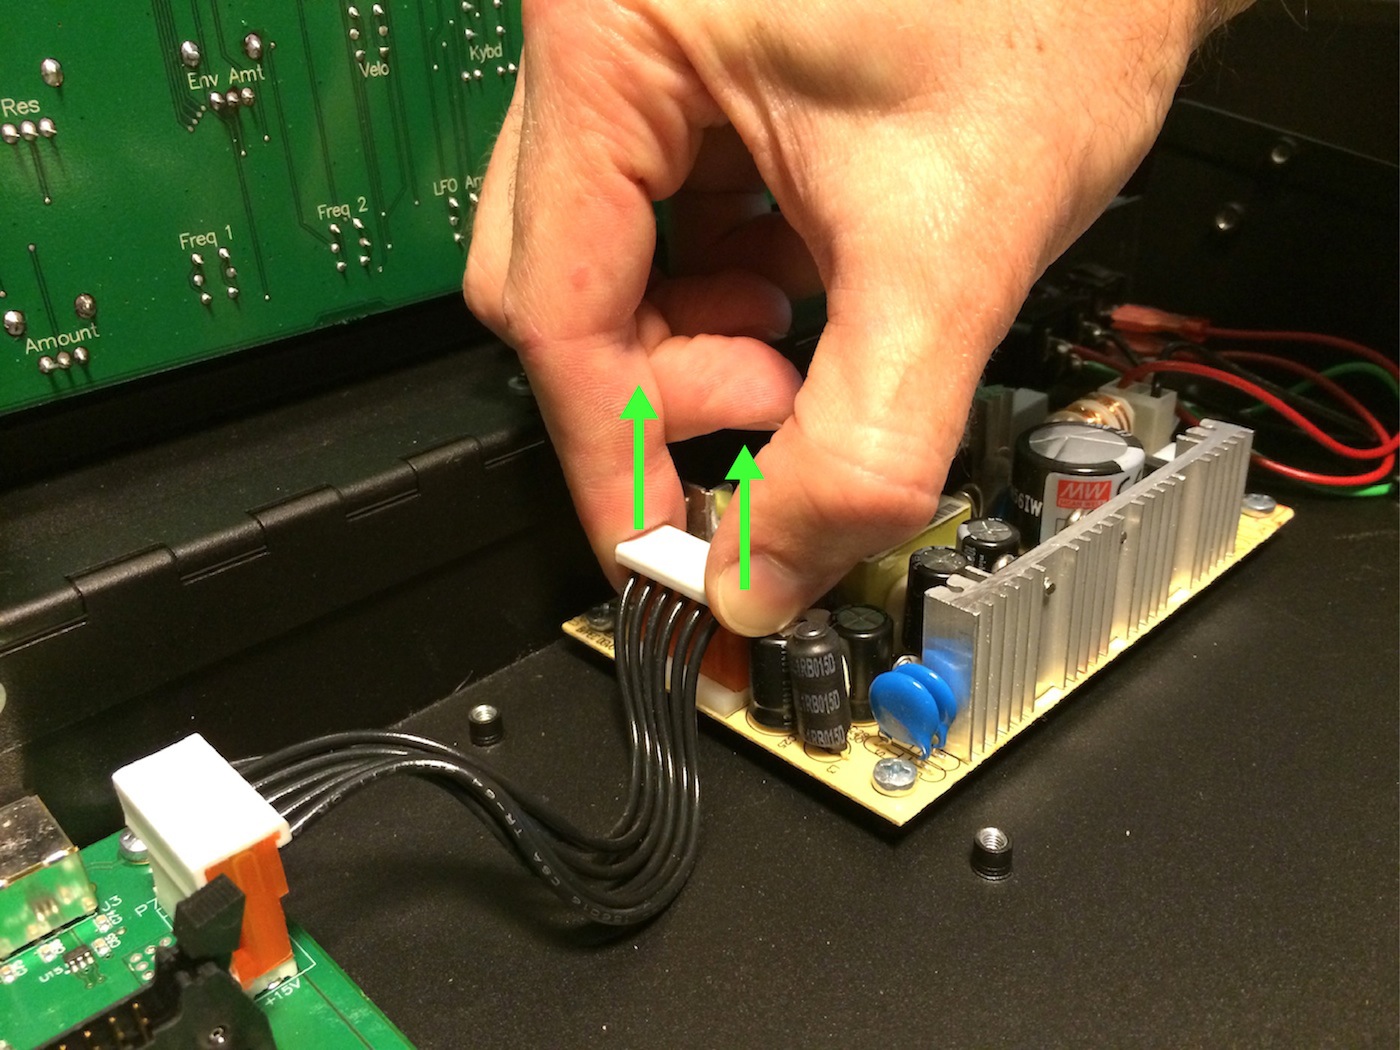
Prophet X/XL PSU Connector
4. The power switch connector is the two-wire connector on the right edge of the power supply, just below the fuse. Gripping the connector itself, pull straight up with a slight side to side wiggle to remove it. DO NOT pull on the wires.

Prophet X/XL PSU Power Switch Connector
5. With the power cables disconnected, remove the 4 silver screws holding the power supply to the Prophet’s metal case. The power supply can now be removed.
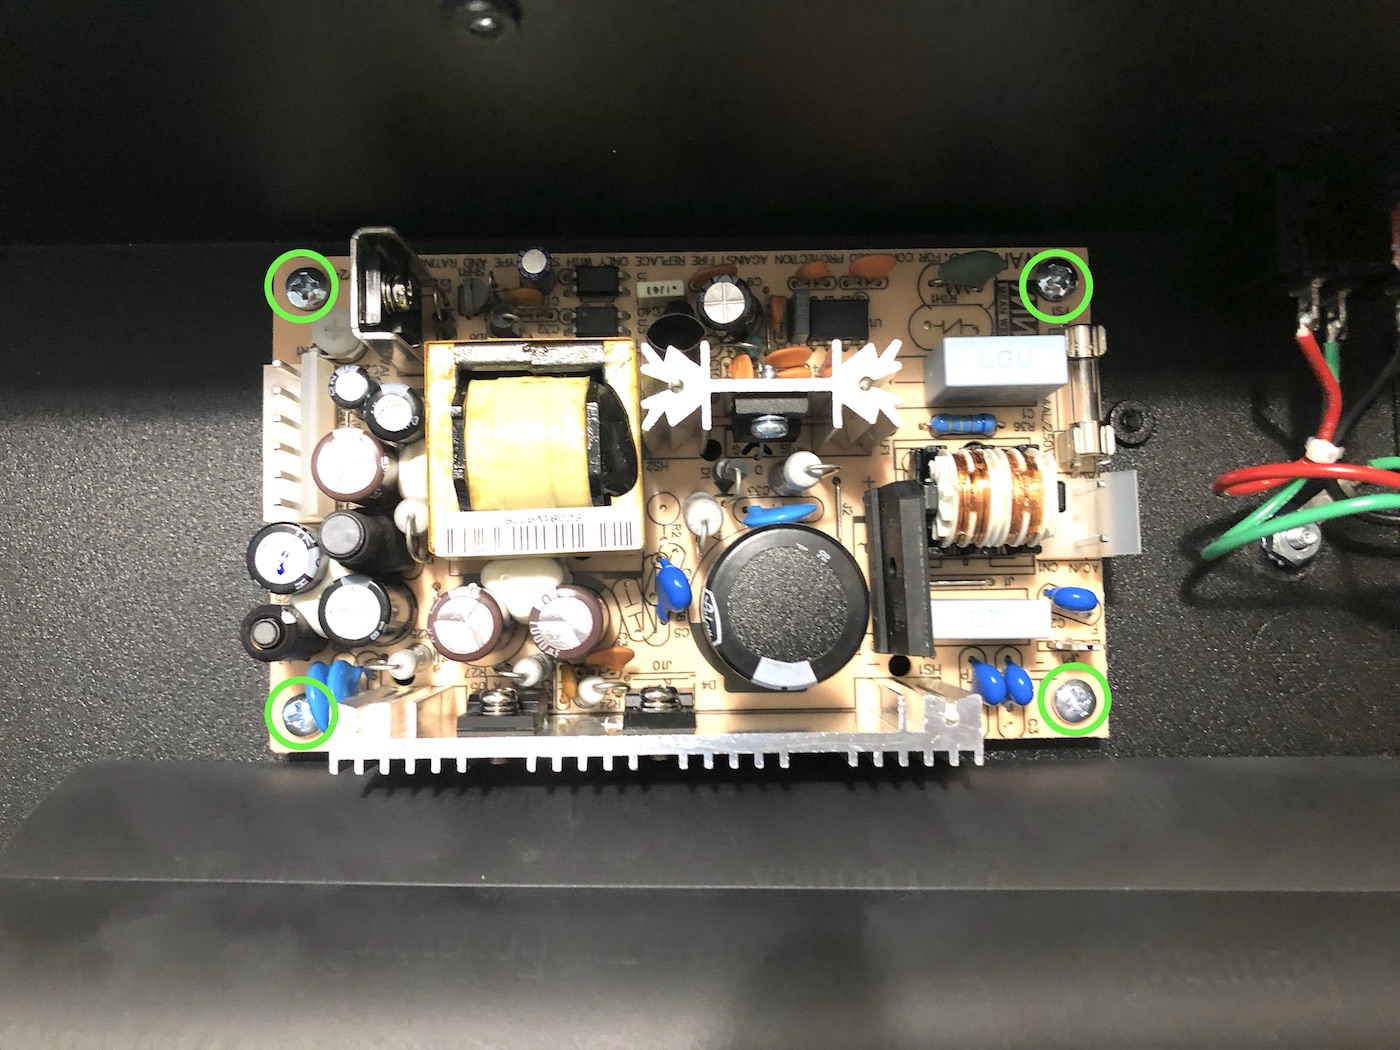
Prophet X/XL PSU Screws
6. Install the replacement PSU and reassemble the Prophet X/XL in reverse order.
Please contact Sequential Technical Support if you have any questions regarding this procedure.